
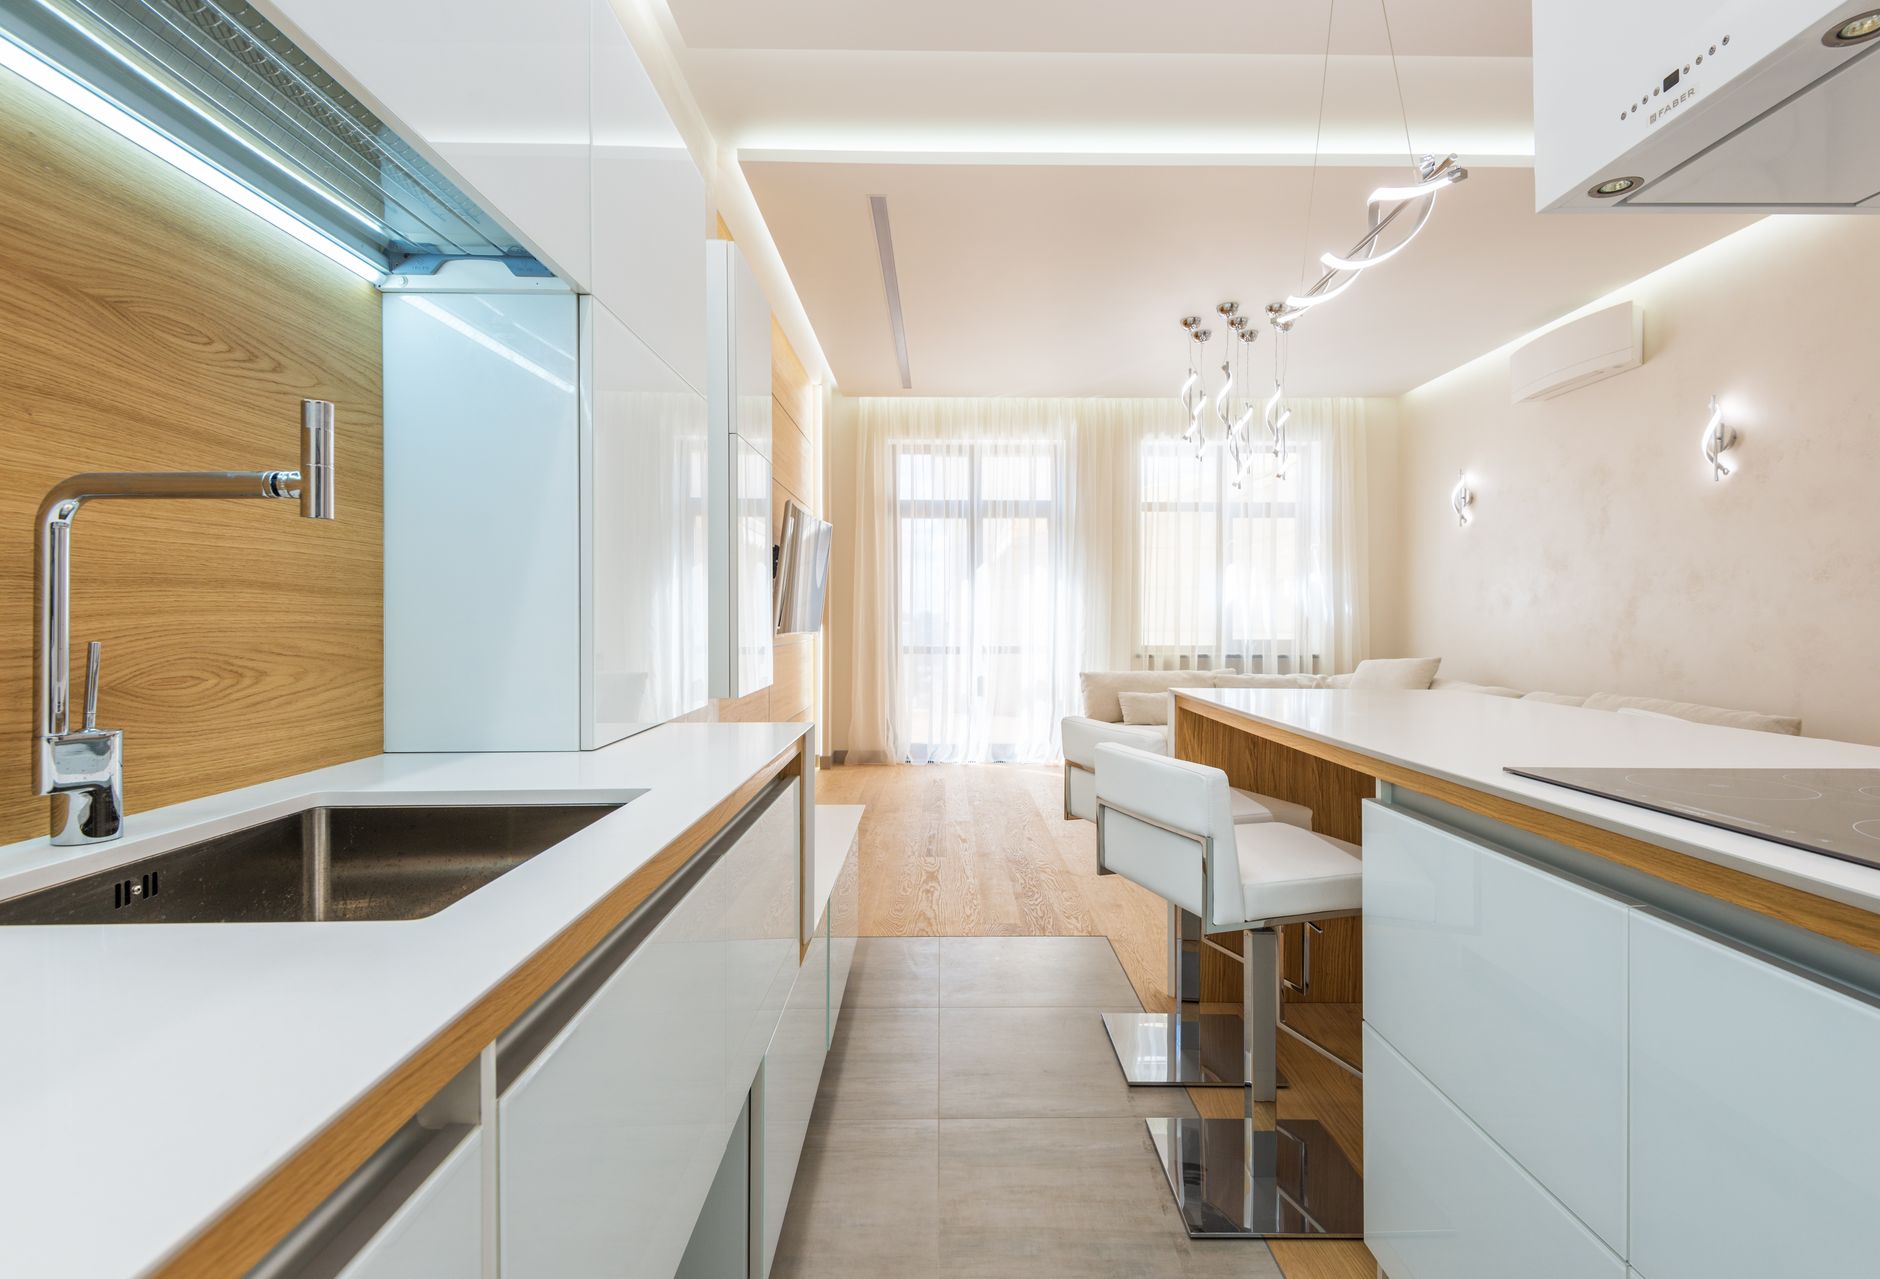
A wet bar or butler's kitchen is a serious selling feature. It signals entertaining capacity, extra storage, and a level of finish that buyers associate with premium properties. Yet in most listings, it gets one cramped, badly lit shot that looks more like a plumbing diagram than a lifestyle space. If you're photographing a property with one of these spaces, it deserves a proper approach.
Understand what the shot needs to communicate
Before you lift the camera, decide what the space is actually selling. A wet bar in an open-plan living area signals entertaining. A butler's kitchen adjacent to the main kitchen signals function and storage. Both sell a lifestyle, but the framing should reflect the specific benefit. An entertaining bar needs atmosphere. A butler's kitchen needs to look orderly and spacious.
That decision shapes everything: your angle, your depth of field, whether you include context from the adjoining room, and how you style the bench surface. Get clear on the purpose first.
Choosing the right angle
Most wet bars and butler's kitchens are narrow. That's the biggest photographic challenge. Shooting straight on from a low position flattens the space and makes it look like a cupboard. Instead, try a slightly elevated angle, around chest height, with the camera positioned at the corner of the room or doorway. This creates diagonal depth that makes a narrow space feel longer.
If the bench wraps an L-shape, shoot from the inner corner of the L. That single position will show both runs of bench, the splashback, any overhead cabinetry, and the sink or tap fixture in one frame. You won't get that from a straight-on shot.
For a butler's kitchen that connects to a main kitchen, consider a shot that shows the opening or servery window between the two. That contextual relationship is exactly what buyers want to understand. It's the spatial story that sells the feature.
Lighting wet bars and butler's kitchens
These spaces are often under-lit. Cabinetry overhead blocks ceiling lights, and the benches themselves can sit in shadow. Don't rely on ambient light alone.
If the cabinetry has under-shelf strip lighting, turn it on. Warm LED strips do a lot of heavy lifting in a butler's kitchen shot. They illuminate the bench surface, add colour and warmth, and signal that the space is fitted out properly. Turn off any harsh overhead globes that create a colour temperature mismatch, then balance your white balance to the strip lighting rather than to the ceiling.
For spaces without built-in task lighting, bring a small LED panel and position it just outside the frame, angled to skim across the bench surface. This side-lighting technique picks up texture in stone or timber benches and avoids the flat, washed-out look that frontal flash produces. The technique is similar to what works when photographing a kitchen for a real estate listing: angled light shows surface quality rather than hiding it.
Watch for reflections in splashbacks and glossy cabinet doors. Tiles and polished stone will bounce your light source back into the lens if the panel angle is wrong. Adjust the panel by 5-degree increments until the reflection drops out of the shot.
Styling the space before you shoot
A wet bar needs a light hand with props. Two or three bottles of spirits with clean labels facing forward, a small ice bucket or cocktail glass, and a single small plant or candle are enough. More than that looks busy. Buyers need to be able to picture their own bottles and glasses in the space, not yours.
For a butler's kitchen, clear the bench almost entirely. One or two prop items maximum: a small fruit bowl or a neatly folded tea towel. The selling point here is the bench space itself, so don't cover it. Open the cabinetry doors one or two inches if the shelves inside are neatly styled. That glimpse of organised shelving reinforces the storage story without requiring a separate shot.
The sink and tap fixture should be spotless. Chrome and brushed nickel show every water spot and fingerprint under direct light. Wipe them down with a microfibre cloth immediately before shooting. This is the same standard of prep that applies to photographing a bathroom with a skylight, where fixture cleanliness makes or breaks the shot.
Lens choice and distortion
A wide-angle lens at 16mm or 18mm on a full-frame body is the natural reach for small spaces, but at those focal lengths distortion bends vertical lines outward and makes straight cabinetry look bowed. Use wide-angle lenses for real estate photography at 24mm or longer if the space allows it. If you must go wider, keep the lens level and correct the vertical distortion in post using the lens profile and manual keystone adjustments in Lightroom or Capture One.
Keep the camera level on a tripod. Even a one-degree tilt makes the bench surface look like it's running downhill, and that reads as wrong to buyers even when they can't identify why.
Getting a second shot: the lifestyle angle
One architectural shot showing the full layout is the anchor image for this space. But if the property has an adjacent dining or living area, consider a second frame taken from further back, showing the wet bar within the context of the entertaining zone. Shoot from the sofa position or the dining table end of the room, with the bar lit and styled in the background.
This wider contextual shot communicates scale and relationship between spaces in a way that a close-up never can. Buyers viewing the listing online will use the architectural shot to understand the spec and the lifestyle shot to imagine the use. Both matter.
Editing for warmth without overcooked tones
Wet bars and butler's kitchens often photograph with a slightly cool, clinical feel because of the chrome and stone surfaces. In editing, raise the warmth slider only enough to bring the white balance to neutral. Don't push it into orange territory trying to manufacture cosiness. A stone bench should look like stone, not like it's been lit by a sunset.
Recover highlight detail in the tap and splashback if they've blown out slightly. A small negative adjustment to highlights in the recovery panel will pull that detail back without darkening the whole frame. Lift shadows gently to open up any dark corners in cabinetry, and add a touch of texture to make stone or timber grain readable on screen.
Export at full resolution. Features like joinery detail, tap quality, and bench thickness are things buyers zoom into, and a low-resolution export will lose exactly the kind of fine detail that justifies the feature's presence in the listing.
One feature, properly told
A wet bar or butler's kitchen can carry genuine weight in a campaign. It's not a throwaway shot. Give it the same attention you'd give any other hero feature: the right angle, controlled light, minimal and intentional styling, and editing that shows the materials honestly. Done well, it's the shot that makes buyers send the listing to a partner and say "look at this."