
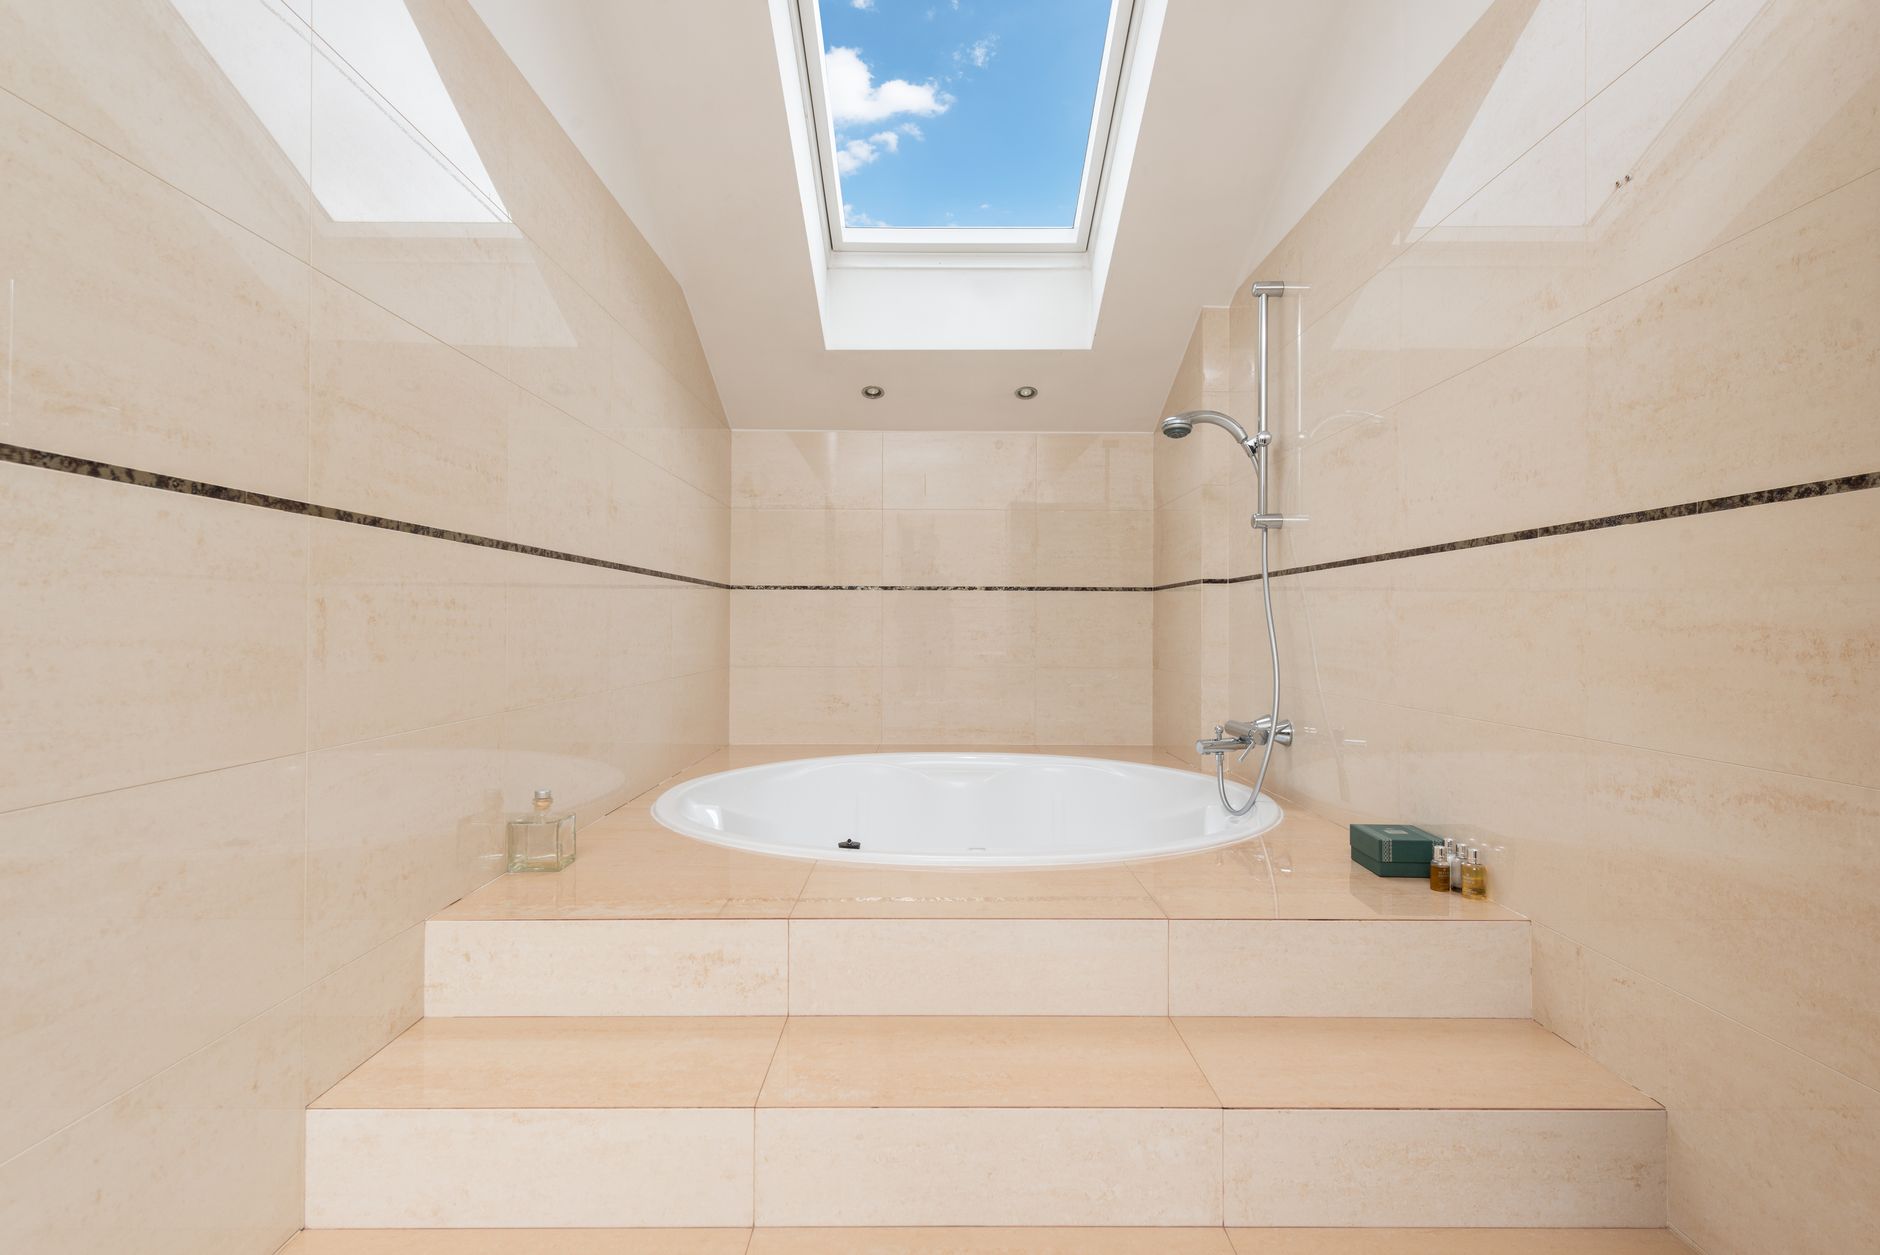
A bathroom with a skylight is a genuine selling point. Natural overhead light makes small tiles glow, bounce off polished fittings, and give the whole room an airy quality that no artificial fixture can replicate. The problem is that same light can blow out to a white void, underexpose the vanity, or cast hard midday shadows that make the room look worse than it does in person. Photographing a skylight bathroom for a real estate listing requires a different approach than a standard bathroom shoot, and the difference between a flat, failed attempt and a standout image usually comes down to three decisions: timing, exposure, and how you manage fill light.
Why skylights cause exposure problems
A camera sensor has a fixed dynamic range. When you point it at a room that includes both a bright skylight and a shaded vanity below, the gap between the brightest and darkest areas often exceeds what the sensor can capture in a single frame. Expose for the skylight and the room goes dark. Expose for the room and the skylight burns out to a featureless white rectangle. Neither result looks like what a buyer sees when they walk in.
The sky itself compounds this. On a sunny day, the patch of sky visible through a bathroom skylight can read at 14 to 16 stops of exposure above a correctly-lit interior wall. That's beyond any camera's single-shot capability. On an overcast day, the gap narrows to something more manageable, often 4 to 6 stops, which is within reach of exposure bracketing or a well-placed flash.
Timing: the single biggest lever
Shoot a skylight bathroom mid-morning or in the mid-to-late afternoon, not at midday. At noon, direct sun falls straight down through the skylight and creates a harsh bright column on the floor or bench below. Move the session to roughly 9 to 10 am or 3 to 4 pm and the sun's angle means the light entering the skylight is softer, more diffuse, and spreads more evenly across the room.
Overcast days are genuinely your friend here. A thin cloud cover acts as a giant natural diffuser over the skylight, softening the output and dropping the brightness gap between sky and interior to a level that bracketing can handle cleanly. If you're scheduling a shoot and the bathroom has a skylight, check the forecast. A partly cloudy window is worth waiting for.
Exposure technique: bracket and blend
For skylight bathrooms, exposure bracketing is the most reliable approach. Shoot a bracket of at least three frames: one exposed for the skylight (which will show detail in the aperture and any visible sky), one exposed for the mid-tones of the room, and one slightly brighter to lift the shadows near the floor and under the vanity overhang. In post-processing, blend these frames using luminosity masks or a dedicated tool like Lumenzia to pull the best exposure from each layer without halos or unnatural transitions.
HDR tone-mapping is tempting but rarely produces clean results in small rooms with reflective surfaces. Bathrooms have tiles, chrome taps, and glass shower screens that all pick up colour casts and ghosting when HDR algorithms over-process them. Manual blend gives you more control and a more natural finish.
Flash placement for skylight rooms
A skylight creates top-down light, which means shadows pool under shelving, beneath vanity overhangs, and at the base of walls. A single off-camera flash bounced off the ceiling can fill these shadows without fighting the skylight's natural direction. Point the flash straight up, not toward the skylight itself, and let the room's ceiling diffuse it. This mimics the skylight's overhead quality and looks cohesive rather than lit-from-the-side.
Keep the flash power low. You're filling, not replacing. If the flash overwhelms the ambient skylight, the room loses its natural feel and the skylight loses its warmth. Start at about 1/16 power and adjust from there. The goal is a shadow-free room where the skylight still reads as the dominant, primary light source. This is broadly the same balance you'd manage when choosing between flash and ambient light in any challenging interior, and the principle holds: let the environment lead, use flash to correct, not control.
Framing to include the skylight
Include the skylight in at least one shot. It's a feature. Buyers scrolling a listing who see a bathroom image with a skylight visible immediately register it as a positive. Frame from a low angle near the floor or from the doorway with the camera tilted slightly upward. This puts the skylight in the upper portion of the frame and gives the room a sense of height.
Avoid shooting directly upward at the skylight. That angle distorts the room and makes the walls converge in a way that feels cramped. A moderate upward tilt of around 5 to 10 degrees from horizontal is enough to include the skylight without the distortion.
Use a wide-angle lens in the 16 to 24mm range on a full-frame body, or equivalent on a crop sensor. This gives the room space to breathe without pushing the skylight so far into the corner it becomes incidental. Keep verticals straight using a tilt-shift lens or correct them in post with Lightroom's guided upright tool.
Reflections and wet surfaces
Skylights reflect in shower glass, polished tiles, and chrome fittings. A camera positioned directly under a skylight will appear as a bright disc in every reflective surface in the room. Shift the camera to one side of the skylight's footprint, even by 30 to 40 cm, and the reflection moves out of the primary surfaces. Check the shower screen before every shot. A single bright smear of reflected light on glass can draw the eye away from the room's best features.
Dry every surface before shooting. Water droplets on glass or tiles pick up the skylight's brightness and turn into distracting bright spots that are tedious to retouch. A clean microfibre cloth on all glass and chrome before the shoot saves time in editing.
A few practical details
Turn on all artificial lights in the bathroom before shooting. Even with a skylight, the warm glow of vanity lights adds depth and makes the space feel more welcoming. In editing, check the white balance carefully: skylights let in blue-shifted daylight, while bathroom vanity lights are often warmer in tone. A mixed-temperature room can look odd. Use Lightroom's adjustment brush to cool the vanity area slightly or warm the ceiling near the skylight to bring the two sources into harmony.
Finally, style the bathroom before the photographer arrives. A skylight draws attention upward, which means the eye travels the full height of the room. Any clutter on the floor, messy shelving, or uninspiring ceiling paint becomes part of the image. Clean towels hung or folded neatly, a small plant on the vanity, and an uncluttered floor are all the room needs. The skylight does the rest.