
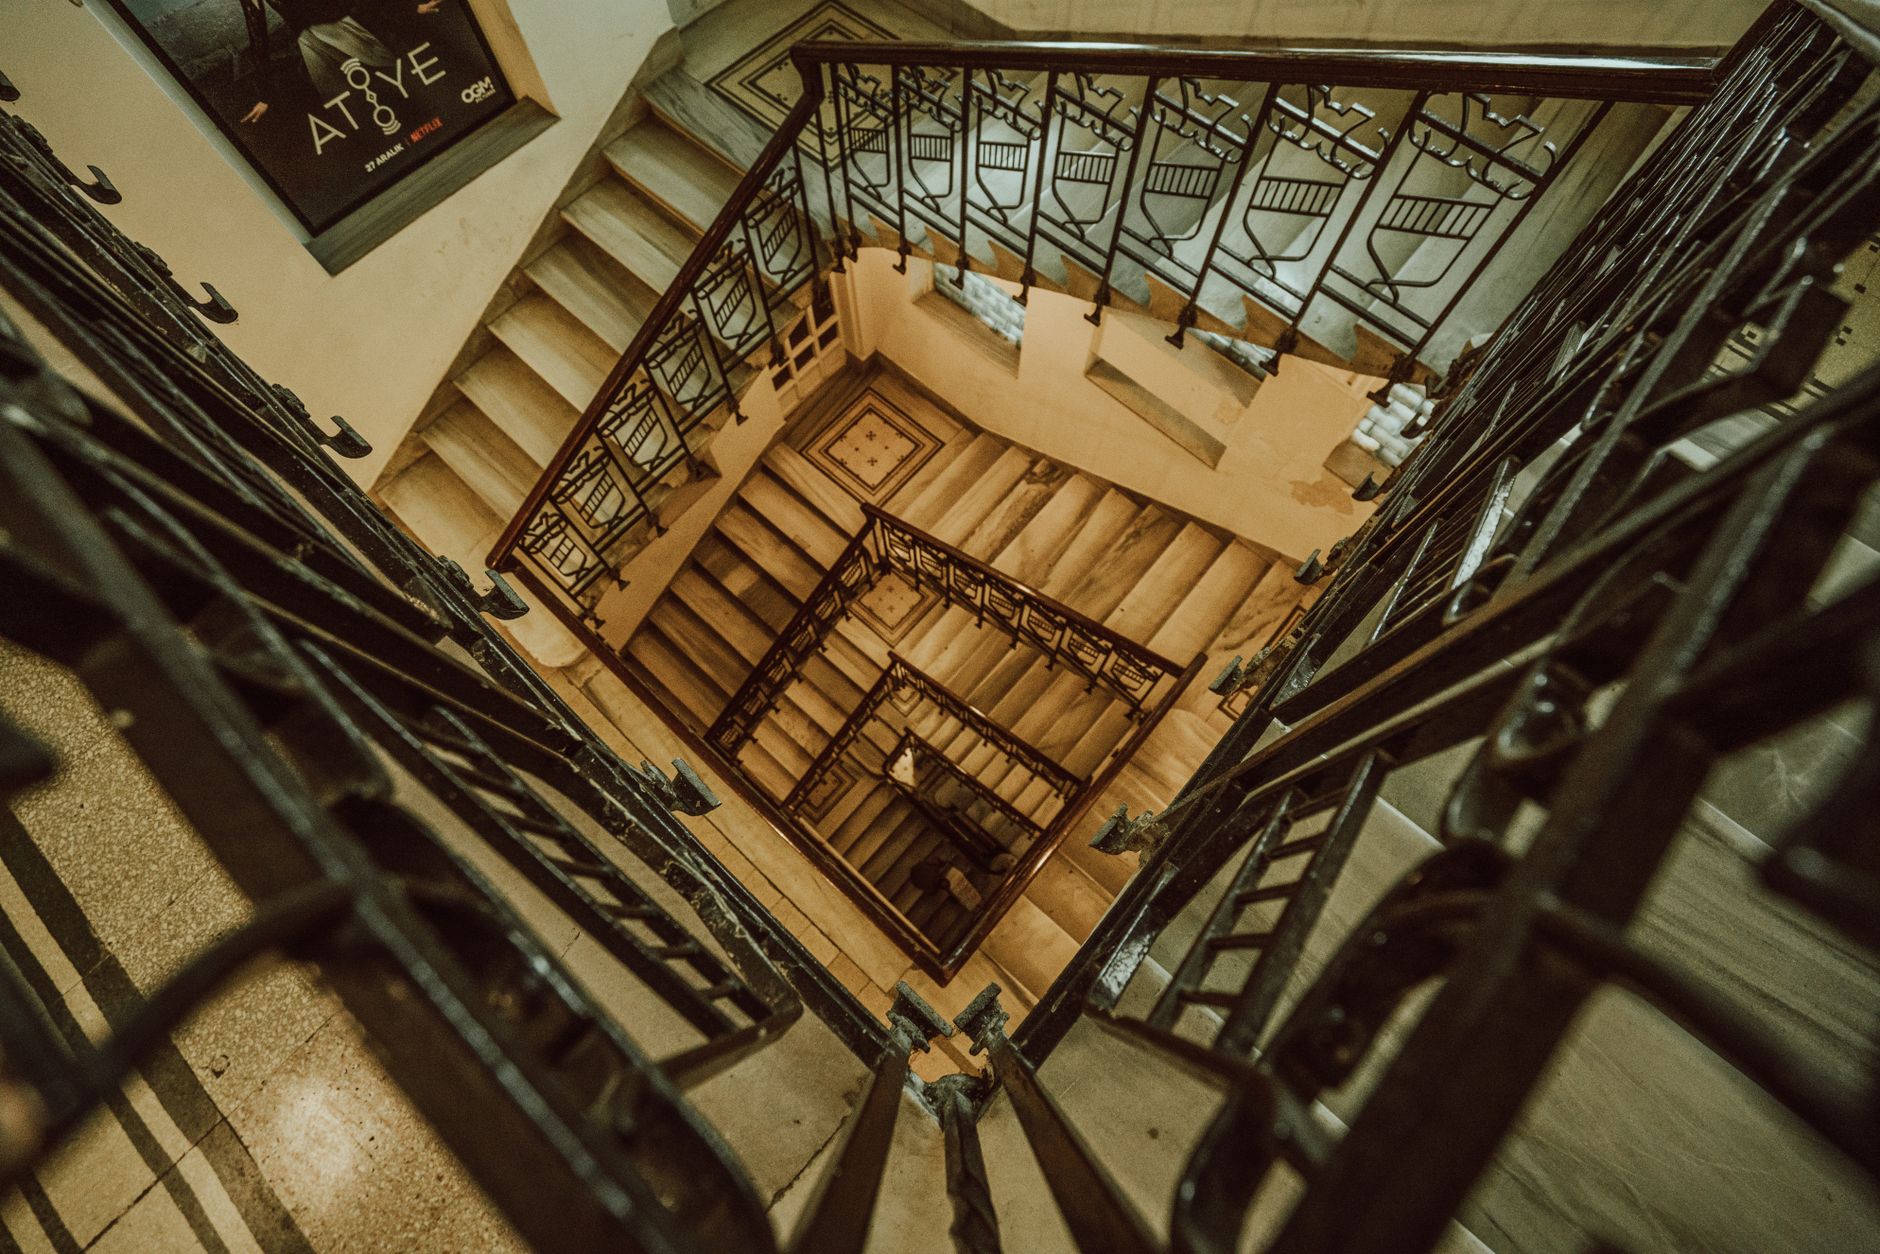
Staircases are one of those architectural features that look impressive in person but fall apart in photographs when the shooter doesn't plan for them. A grand timber stair can read as a dark, cramped wedge if the camera is in the wrong spot. Get it right, and that same staircase becomes the image that stops buyers mid-scroll. Real estate photography rewards careful decisions about angle, focal length, and light, and staircase photography demands all three at once.
Why staircases are difficult to shoot
The core problem is geometry. Staircases occupy a vertical slice of space in a building that's primarily horizontal. They rise through multiple floors, sit against walls, and often run through tight hallways with very little room to step back. The typical foyer or entry hall gives you a metre or two of clearance at best.
Light compounds the geometry problem. Entry halls and stairwells are frequently the darkest areas of a home because windows are small or nonexistent. Where light does exist, it's often from a single overhead fitting, which creates harsh shadows under each tread. Balustrades, spindles, and handrails add visual complexity that can easily read as clutter rather than detail.
The result is that most photographers either skip a dedicated staircase shot or take a quick frame from the bottom that shows very little. Both are missed opportunities.
Choosing the right angle
Three positions consistently produce usable staircase shots: straight-on from the bottom, from a landing looking down, and a three-quarter angle from the adjacent room.
Shooting straight from the bottom works best for staircases with a strong symmetrical design. Centre the frame on the midpoint of the first riser, keep the camera at roughly chest height, and ensure the top of the staircase is visible. If the staircase turns at a landing, this angle captures the first flight cleanly and implies the space beyond.
The landing-down angle is underused. Position the camera on the mid-landing or at the top of the first flight, point it downward at roughly 45 degrees, and capture the full arc or sweep of the stair below. This angle works particularly well for curved or spiral designs because it reveals the shape that floor-level shooting misses entirely. It also gives buyers a sense of the ceiling height and the entry space as a whole.
The three-quarter angle from an adjacent room, typically a living or dining area, places the staircase as part of a larger spatial story. It shows how the stair connects spaces and gives a sense of flow through the home. For wide-angle lens use in real estate photography, this is the angle where a 16mm or 17mm focal length earns its keep, pulling in the surrounding space without distorting the stair geometry when the camera is positioned thoughtfully.
Managing light on a staircase
Natural light from a skylight or high window above the stair is the best-case scenario. It creates a soft, directional fill that wraps around the treads and balustrade without creating the harsh tread-shadow problem that overhead fittings produce. If the property has a stairwell window, shoot with that window just outside the frame or at the edge of it. Don't shoot directly into it.
In low-light stairwells, a single off-camera flash bounced off the ceiling above the stair is more effective than raising ISO. The bounce spreads light evenly across the full height of the staircase and avoids the raccoon-eye shadows that a direct flash or overhead fitting casts under each tread. If the staircase is long, two flashes at different heights give better coverage than one. The techniques covered in flash vs. ambient light for real estate photography apply directly here: balance the flash output to the ambient so the image doesn't look artificially lit.
Timber staircases in particular benefit from sidelight. If there's a window to one side of the hall, use it. The raking light picks up the grain and warmth of the timber and makes the material feel tactile in a way that flat overhead lighting simply can't.
Focal length and distortion
The temptation is to reach for the widest lens available to capture the full height of the stair in a tight space. Resist it. At 12mm or 14mm, vertical lines bow noticeably, and straight balusters start to look like barrel staves. It also exaggerates the distance between the camera and the staircase, making the space feel both bigger and less credible than it is.
A focal length between 17mm and 24mm is the practical range for most staircase shots on a full-frame sensor. At 24mm in a tight hallway, use a tripod and take your time composing rather than pushing wider. A correctly set up tripod, held level, keeps verticals straight and removes camera shake from a potentially slow shutter in a dim stairwell. That discipline pays off in the edit and in the final image's ability to hold up at full screen size.
Composition details that matter
Three compositional specifics separate a professional staircase image from a competent snapshot.
- Tread count: try to show at least 5 to 7 treads. Fewer than that and the staircase reads as an afterthought rather than a feature.
- Handrail as a leading line: position the camera so the handrail draws the eye upward into the frame. It's one of the strongest leading-line opportunities in an interior shot.
- Clear the base: remove shoes, bags, and anything stored under the stair before shooting. The bottom of a staircase is a common dumping ground and it kills an otherwise strong image.
Editing staircase shots
Vertical correction is the first edit. In Lightroom or Capture One, use the guided upright tool rather than auto-correction. Select two vertical lines, ideally the balusters, and let the tool correct to them. Auto-correction often over-rotates, creating a mild keystone effect that looks unnatural.
Shadow recovery matters more on staircase shots than on most interior frames. Each tread casts a shadow on the one below it. Pull the shadows slider up enough to show detail in those recessed areas without flattening the image. The goal is to show the depth of each step, not to eliminate it. A staircase with no shadow reads as flat and dimensionless.
Finally, check the highlights on any window or skylight in the frame. Blown-out white is always a problem, but next to the dark tones of a stairwell it's particularly jarring. A bracketed exposure or a manual blend gives you the most control here. The workflow described in bracketing vs. single exposure for real estate photography applies well to staircase shots where the tonal range is extreme.
When to include a staircase shot in the final gallery
Not every staircase warrants its own image. A basic carpeted stair in a standard suburban townhouse adds little to a gallery. A feature timber or wrought-iron staircase in a period or prestige home absolutely does. Use judgement: if a buyer walking through the home would stop and comment on the staircase, photograph it properly. If they'd walk past it, spend your time on the rooms.
Where a staircase does make the gallery, position it as the third or fourth image, after the hero exterior and the primary living space. It works as a transition shot that conveys the scale and quality of the home before buyers reach the bedroom and bathroom images.