
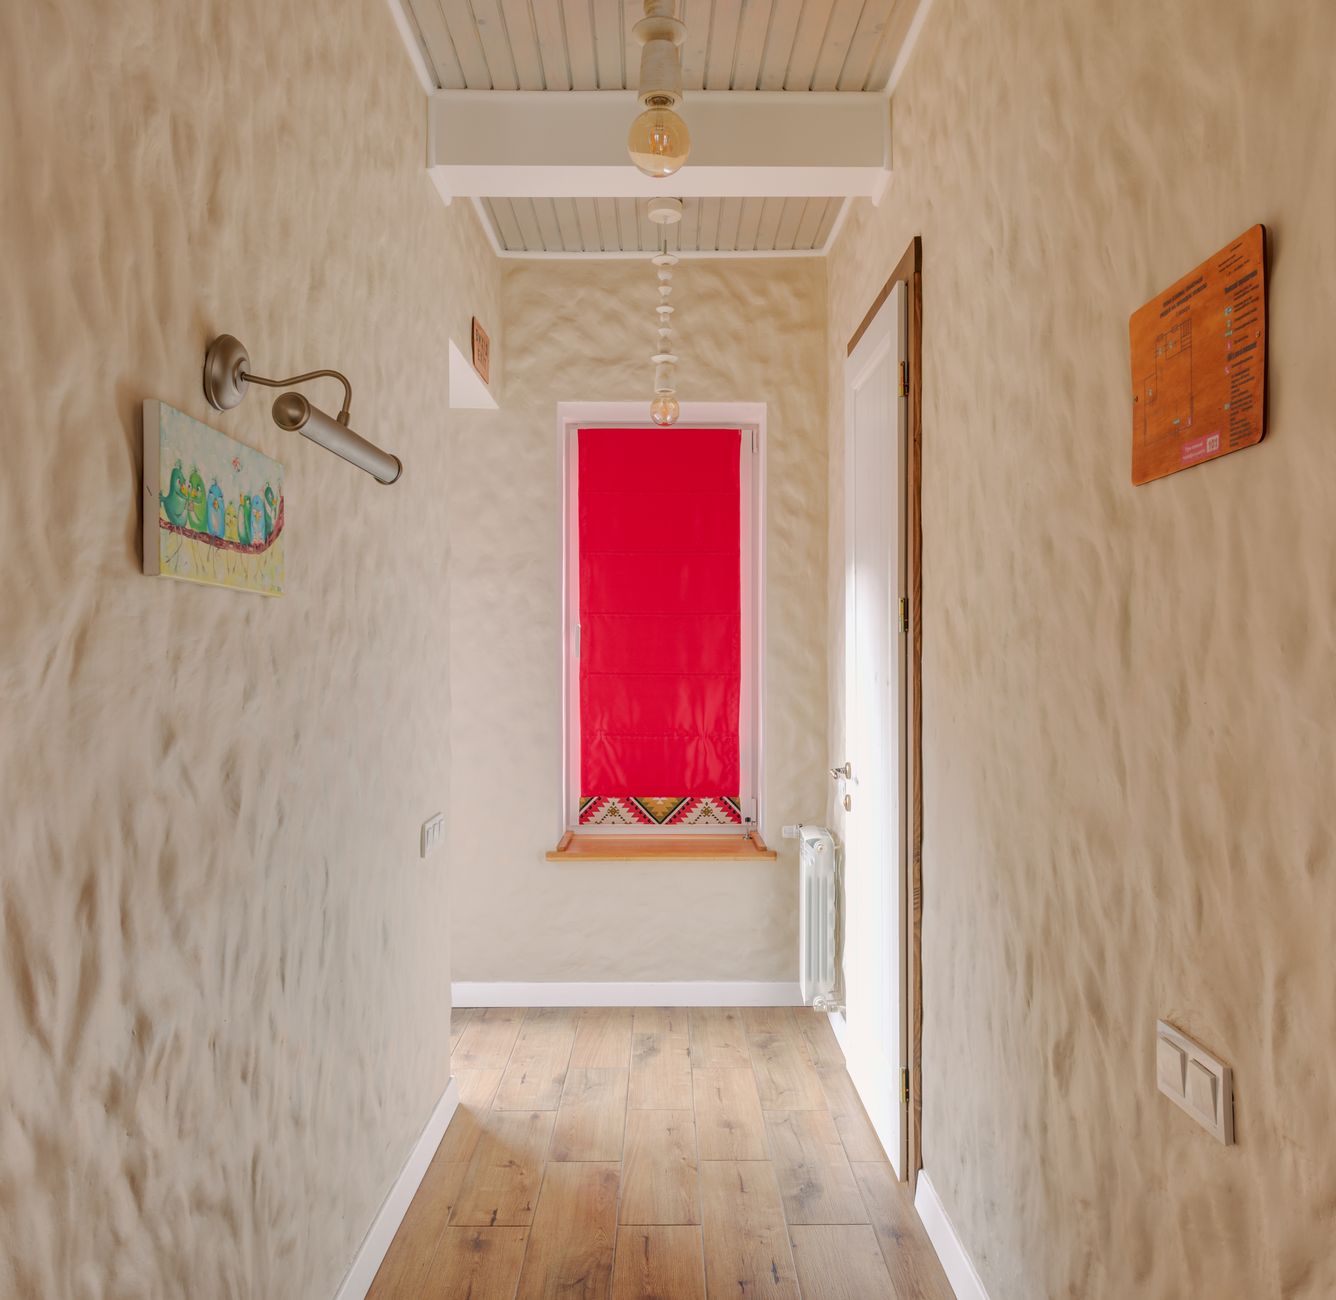
The hallway is almost never the hero shot in a real estate listing. But it's one of the first interior spaces buyers see when they walk through a property, and a badly photographed corridor can quietly undermine confidence before they've even reached the living room. Photograph a narrow hallway well and it does exactly what it should: it moves the viewer forward.
Why narrow hallways are genuinely difficult
The problem with a narrow hallway isn't just width. It's a combination of factors that compound each other: limited space to stand back, parallel walls that create distortion at the edges, inconsistent light sources at either end, and very little visual breathing room for the eye to land on. A lens that works beautifully in an open-plan kitchen can turn a hallway into a tunnel of warped lines and dark corners.
The other issue is that hallways are transitional. They don't have a single focal point the way a kitchen or bathroom does. The job of the photo is to suggest depth and flow rather than sell a feature. That's a different creative problem, and it calls for a different approach.
Lens choice: go moderate, not ultra-wide
The instinct with a tight space is to reach for the widest lens available. In a hallway, that's usually wrong. An ultra-wide focal length (below 16mm full-frame equivalent) will bow the walls outward and exaggerate the corridor effect, making the space look narrower and more claustrophobic than it actually is. Buyers notice the distortion even when they can't name it.
A 24mm to 35mm full-frame equivalent is the better range. It gives you enough field of view to work with limited depth, but keeps the wall lines honest. Kitti Rivers Real Estate Photography uses this approach consistently: the goal is a natural perspective that reflects how the space actually feels to stand in.
If you're using a wide-angle lens for the rest of the shoot, this is worth keeping in mind. The technique for wide-angle lenses in real estate photography varies meaningfully by room type, and a hallway is one of the clearest cases where pulling back to a more moderate focal length pays off.
Camera position and height
Shoot from one end of the hallway, not from the side. Position the camera at the very opening of the corridor and aim toward the far end, ideally toward something worth seeing: a window, a piece of furniture, a room opening onto natural light. That terminal point anchors the shot and gives buyers a reason to feel drawn into the image rather than just confronted by two walls.
Height matters more in a hallway than in most rooms. Shooting too low emphasises the floor and makes the space feel squat. Too high and the ceiling dominates. Eye level, around 1.2 to 1.4 metres, is the right starting point. If there's a pendant light or architectural detail worth showing, adjust slightly and check that the ceiling line reads cleanly.
Centre the camera precisely. Even a few centimetres off-axis will cause one wall to appear closer than the other, which reads as a crooked shot. A spirit level or in-camera grid overlay fixes this quickly.
Lighting a hallway without blowing out the exit
The classic hallway exposure problem is this: if you expose for the dark corridor walls, the room or window at the far end blows out. If you expose for the bright end, the walls go dark and featureless. Neither result is good.
There are two reliable solutions. The first is exposure bracketing: shoot 3 to 5 frames at different exposures and blend them in post. This gives you clean shadow detail in the corridor and a controlled bright area at the far end. The second is a single off-camera flash or a bounced speedlight aimed back from the middle of the hallway toward the camera end, filling the shadow areas without adding a visible light source to the frame. A combination of both is ideal on a particularly dark corridor.
For the full trade-offs between these approaches, the breakdown of bracketing versus single exposure in real estate photography covers the decision clearly.
One thing to avoid: placing a flash directly behind the camera pointing down the hallway. This creates a flat, institutional look, removes all sense of depth, and produces a harsh hotspot on the far wall. Light from the side, even if you're bouncing off one of the corridor walls, produces a far more natural result.
Styling the hallway before the shoot
A narrow hallway needs to be genuinely empty before you photograph it. Even a single item on the floor, a pair of shoes, an umbrella stand, a dog lead, reads as clutter when the frame is as tight as a corridor shot. Everything on the floor goes. Everything.
Wall art can stay if it's intentional and frames the shot. A single piece at mid-height on the far wall draws the eye forward. Multiple pieces on both walls create visual noise and make the corridor feel busier. One strong piece, or nothing, is the right call.
Mirrors are genuinely useful in a hallway. A well-placed mirror reflects light back down the corridor, visually widens the space, and adds depth. If there's already a mirror in the hallway, position it to catch the brightest light source available. If there isn't one, it's worth considering for the shoot.
Using the hallway to connect spaces
The best hallway shots don't just show the corridor. They preview what's coming. Shoot from an angle that lets a bedroom door, a living area, or a bathroom appear in the background, partially open. This gives the image a sense of layered space and makes the property feel larger. It's the same logic that drives shooting through doorways in adjacent rooms: visual depth sells square metres.
If the hallway leads to a staircase, consider whether the staircase can be the terminal point of the shot. A well-framed stair at the end of a corridor creates a compelling composition and signals the home has vertical space worth exploring. The techniques for photographing staircases in real estate listings apply here, particularly around managing the lines between vertical and horizontal elements.
Post-processing: correct the verticals, match the colour
Even with a moderate focal length and a centred camera, hallway shots often need vertical correction in post. Parallel walls make any slight upward or downward camera tilt obvious. In Lightroom, the Transform panel's Vertical slider, or the Guided Upright tool, straightens these in seconds. Get the walls truly parallel to the frame edges.
Colour consistency is the other priority. If the hallway has warm incandescent downlights at one end and cooler daylight coming from the far room, the corridor will show a colour shift that reads as uneven. Selective white balance adjustments using a radial or linear mask clean this up without affecting the rest of the image.
Don't over-brighten the shadows. A hallway with a small amount of shadow depth looks architectural and intentional. One that's been pushed to look uniformly bright looks flat and processed. The goal is a corridor that feels like it has volume, not a room that's been lit from every direction.
When the hallway is genuinely too narrow to shoot straight
Some hallways are so tight that shooting from one end produces an uncomfortably compressed image no matter what lens you use. In that case, the angled shot from a doorway or adjacent room becomes the better option. Position the camera just outside the hallway entrance and shoot at a 45-degree angle down the corridor. This shows the length of the space without the claustrophobic feeling of a straight-on shot, and it gives the eye a more comfortable entry point into the frame.
If the hallway simply can't be photographed well as a standalone shot, include it as a background element in a shot of an adjacent room instead. A partially visible corridor behind an open door adds depth to a living room or bedroom photo without needing its own dedicated frame.