
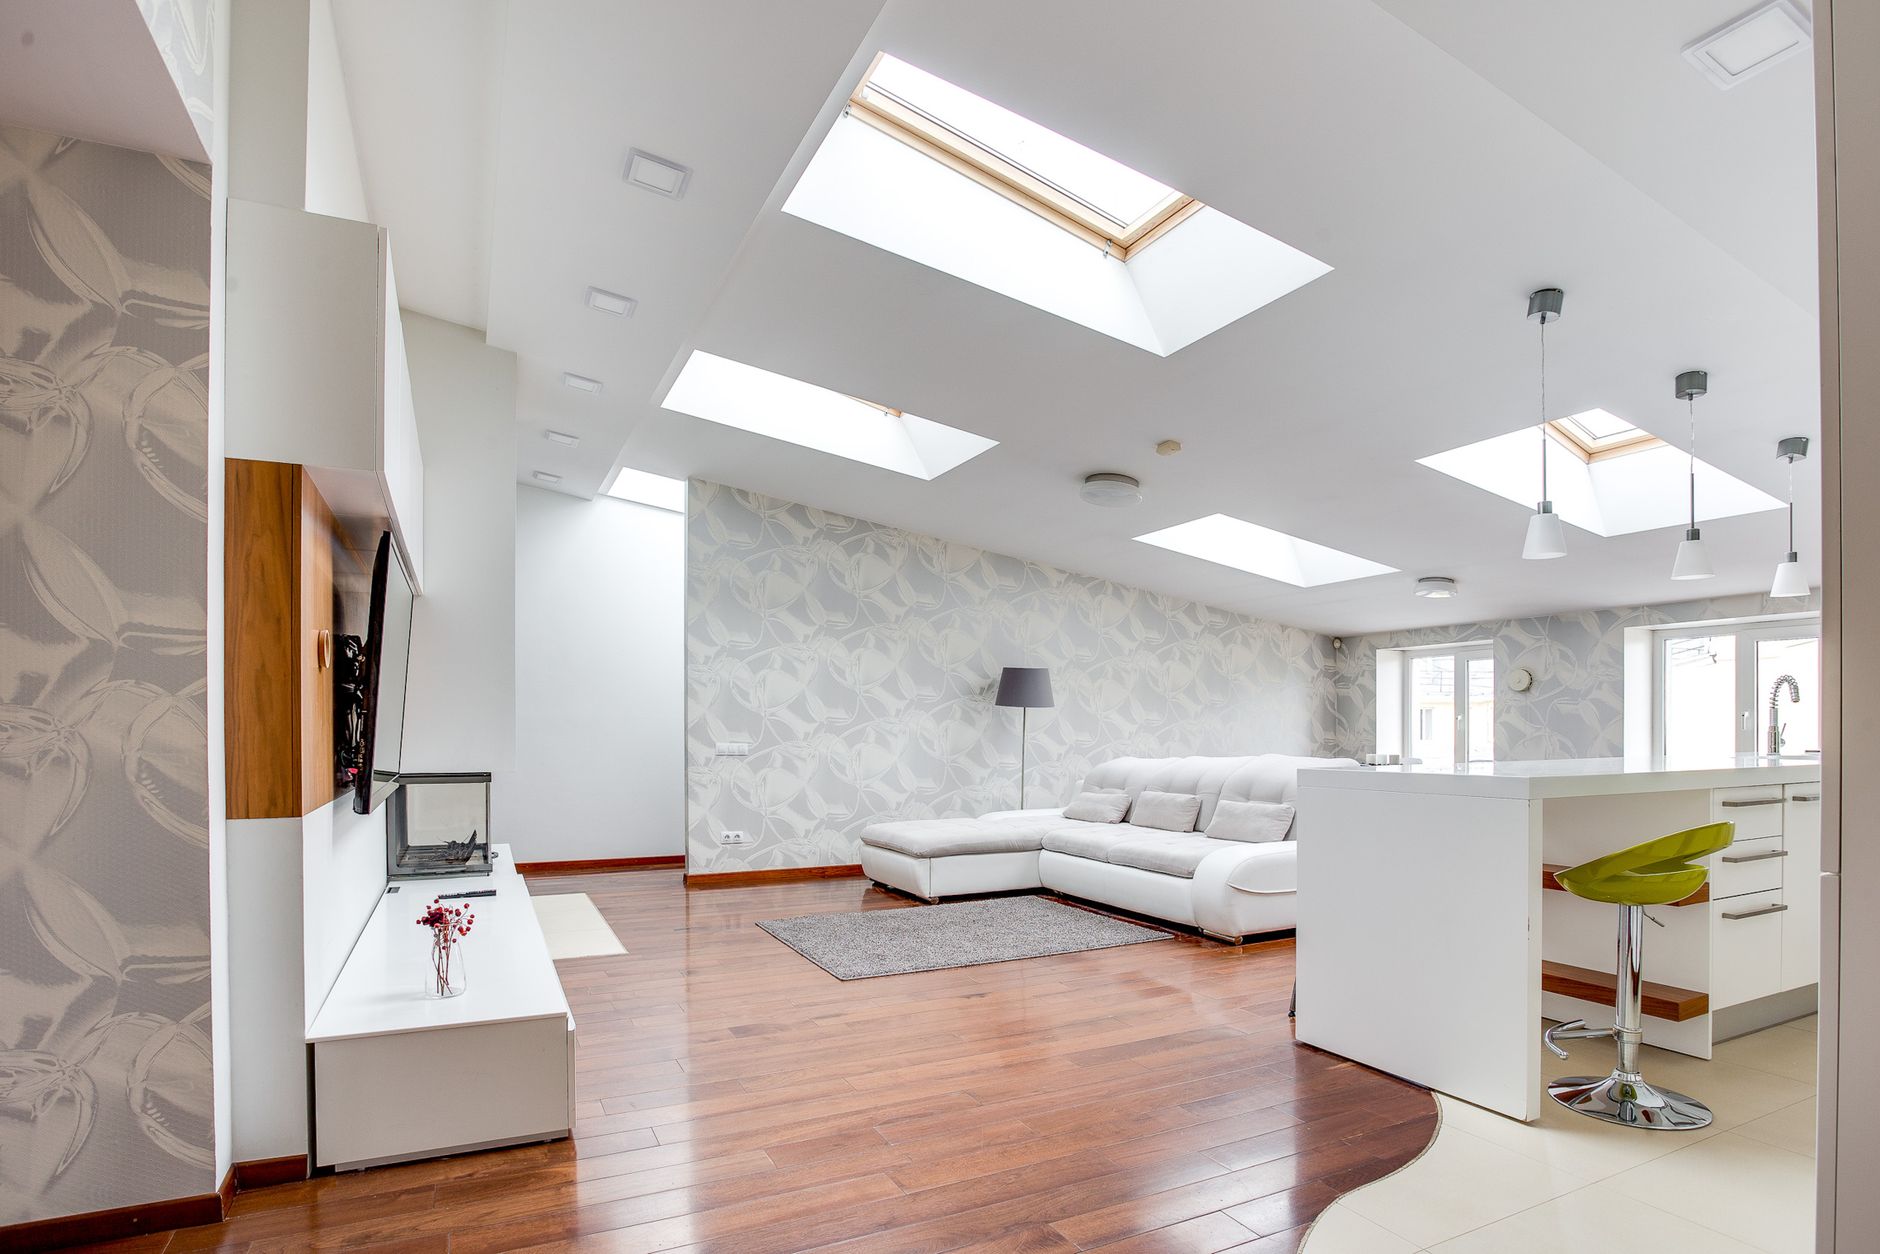
A skylight is exactly the kind of feature buyers circle on a floor plan and remember after the open home. Natural light flooding down from above, a blue sky visible through the ceiling, the sense of openness it creates in even a compact room. Yet most listing photos either burn the glazing to a white rectangle or underexpose the room trying to hold the sky. Neither version serves the property. Photographing a skylight or roof window well is a specific technical challenge, and solving it isn't complicated once you understand why it's difficult.
Why skylights are harder to expose than standard windows
A wall window sits at eye level. Your camera sensor is roughly pointing at a mix of wall, furniture and window, and you can bracket exposures or use flash to balance the light differential. A skylight is a light source pointing directly at your lens from above, in a position your flash can't easily fill. The dynamic range between the bright glazing and the shaded floor can easily span 6 to 8 stops, which exceeds what a single raw capture can hold.
The result, if you don't compensate, is one of two failures. Either the room looks correct and the skylight is a blown-out white void, or the skylight looks like a recognisable sky and the room beneath it is too dark to read. Neither reading tells the buyer what the room actually feels like.
Shooting time matters more with skylights than with any other window. A north-facing skylight at 10 a.m. in summer is a very different problem from the same skylight at 3 p.m. on an overcast afternoon. The overcast version is actually easier: a soft, diffused source with a far smaller luminosity gap between sky and room.
The exposure and blending approach
Bracketing is the cleanest solution. Shoot at least three exposures: one correctly exposed for the room interior, one exposed for the skylight glazing itself, and one midpoint. In post-processing, blend the exposures manually in Photoshop or use luminosity masking to replace the blown skylight with a correctly exposed version from your darker bracket.
This is the same HDR-adjacent workflow that solves large windows, explained in depth in the guide on photographing a property with large windows and blown-out sky. The key difference with skylights is the mask geometry: you're masking an overhead patch rather than a wall-length rectangle, which is geometrically simpler but optically trickier because the sky colour shifts as you look straight up versus at an angle.
Aim for a skylight rendering that looks credible rather than dramatic. A deep-blue midday sky in a bracket taken at 1/800s often looks artificial when composited into an interior exposed at 1/15s. Use a sky that matches the lighting mood of the room below it.
Camera position and angle
Where you place your tripod changes everything. Position the camera directly beneath the skylight and shoot upward slightly and you'll get the worst possible angle: the full glare of the light source aimed straight at the sensor, and a distorted sense of the room's size. Instead, position the camera at the far end of the room and shoot back toward the skylight. The skylight becomes a compositional element in the upper third of the frame, the room reads correctly in the foreground, and the light from the skylight actually illuminates the features you want buyers to see.
Keep the tripod height at roughly 120 cm (chest height for a seated adult). This is the standard real estate sweet spot. Go higher and you're shooting at the skylight; go lower and you lose the connection between the light source and the room below it.
Using flash to balance the room
Off-camera flash positioned to the side of the room, bounced from a wall or ceiling, can lift the ambient exposure of the interior without touching the skylight at all. This narrows the dynamic range gap before you even reach the blending stage. Use a power setting that brings the room interior to within 2 stops of the skylight glazing and the blend becomes a far more straightforward operation.
Don't aim the flash upward trying to fill the skylight from below. It won't reach the exterior sky, and the spill will create a hot spot on the ceiling directly under the glazing that reads as artificial. Keep the flash working on the room, not on the sky.
The flash vs. ambient light guide covers the broader decision framework for when to use supplemental lighting on a property shoot. For skylight situations specifically, a single off-camera strobe at 1/8 to 1/4 power, bounced off a side wall, is usually enough to close the gap.
Timing the shoot around the skylight
If you have any scheduling flexibility, use it. These are the three practical windows for skylight photography:
- Overcast midday: The sky acts as a giant diffuser. The luminosity gap is minimal, the light in the room is even, and you may be able to achieve a clean single-exposure shot without blending.
- Early morning or late afternoon: Lower sun angles mean the skylight isn't a direct overhead glare source. The light it throws into the room is warmer and more directional, which flatters interiors.
- Avoid harsh midday sun on clear days: Direct sun through a skylight creates hard shadow patterns on floors that compete with your composition and make blending far more complex.
Tube skylights and smaller roof windows
Tubular skylights (the kind with a reflective shaft and a diffuser disc on the ceiling) are a different proposition. They don't read as windows. They read as ceiling features, and buyers often don't know what they're looking at from a photo alone. The best approach is to ensure the room is lit primarily by the tube skylight with all artificial lights switched off, then shoot a detail frame looking up at the diffuser with a 24mm or wider lens. This context shot explains the feature clearly. Include it alongside your standard room wide shot.
Standard roof windows, like Velux units installed in a pitched roof, are easier to photograph because they have visible framing and often an opening mechanism buyers recognise. Treat them as you would a wall window: expose for the room, bracket for the sky, blend in post.
What not to do
Don't attempt to shoot the skylight at twilight hoping to capture an interesting sky. The glazing will read as a black rectangle, the room will look underlit, and the feature disappears entirely. Twilight shooting works beautifully for pools and exteriors, but it actively hides skylights.
Don't style the room beneath the skylight with tall furniture or plants that block the light path. The light falling on the floor or a bench surface is part of what communicates the feature to a buyer. Clear the zone directly beneath the glazing.
And don't leave the room's recessed downlights on at full brightness. They compete with the skylight as a light source, flatten the sense of natural illumination, and give the room a slightly clinical look. Switch them off or dim them to 30 percent, let the skylight do the work, and fill gaps with off-camera flash as needed.
The finished shot
A well-executed skylight photo shows three things: a credible sky through the glazing, a correctly exposed room beneath it, and the actual effect of that light on the surfaces it touches. Buyers don't just want to see the skylight exists. They want to feel what the room is like when the sun comes through it. That's the story the photograph needs to tell, and getting the exposure balance right is the only way to tell it.