
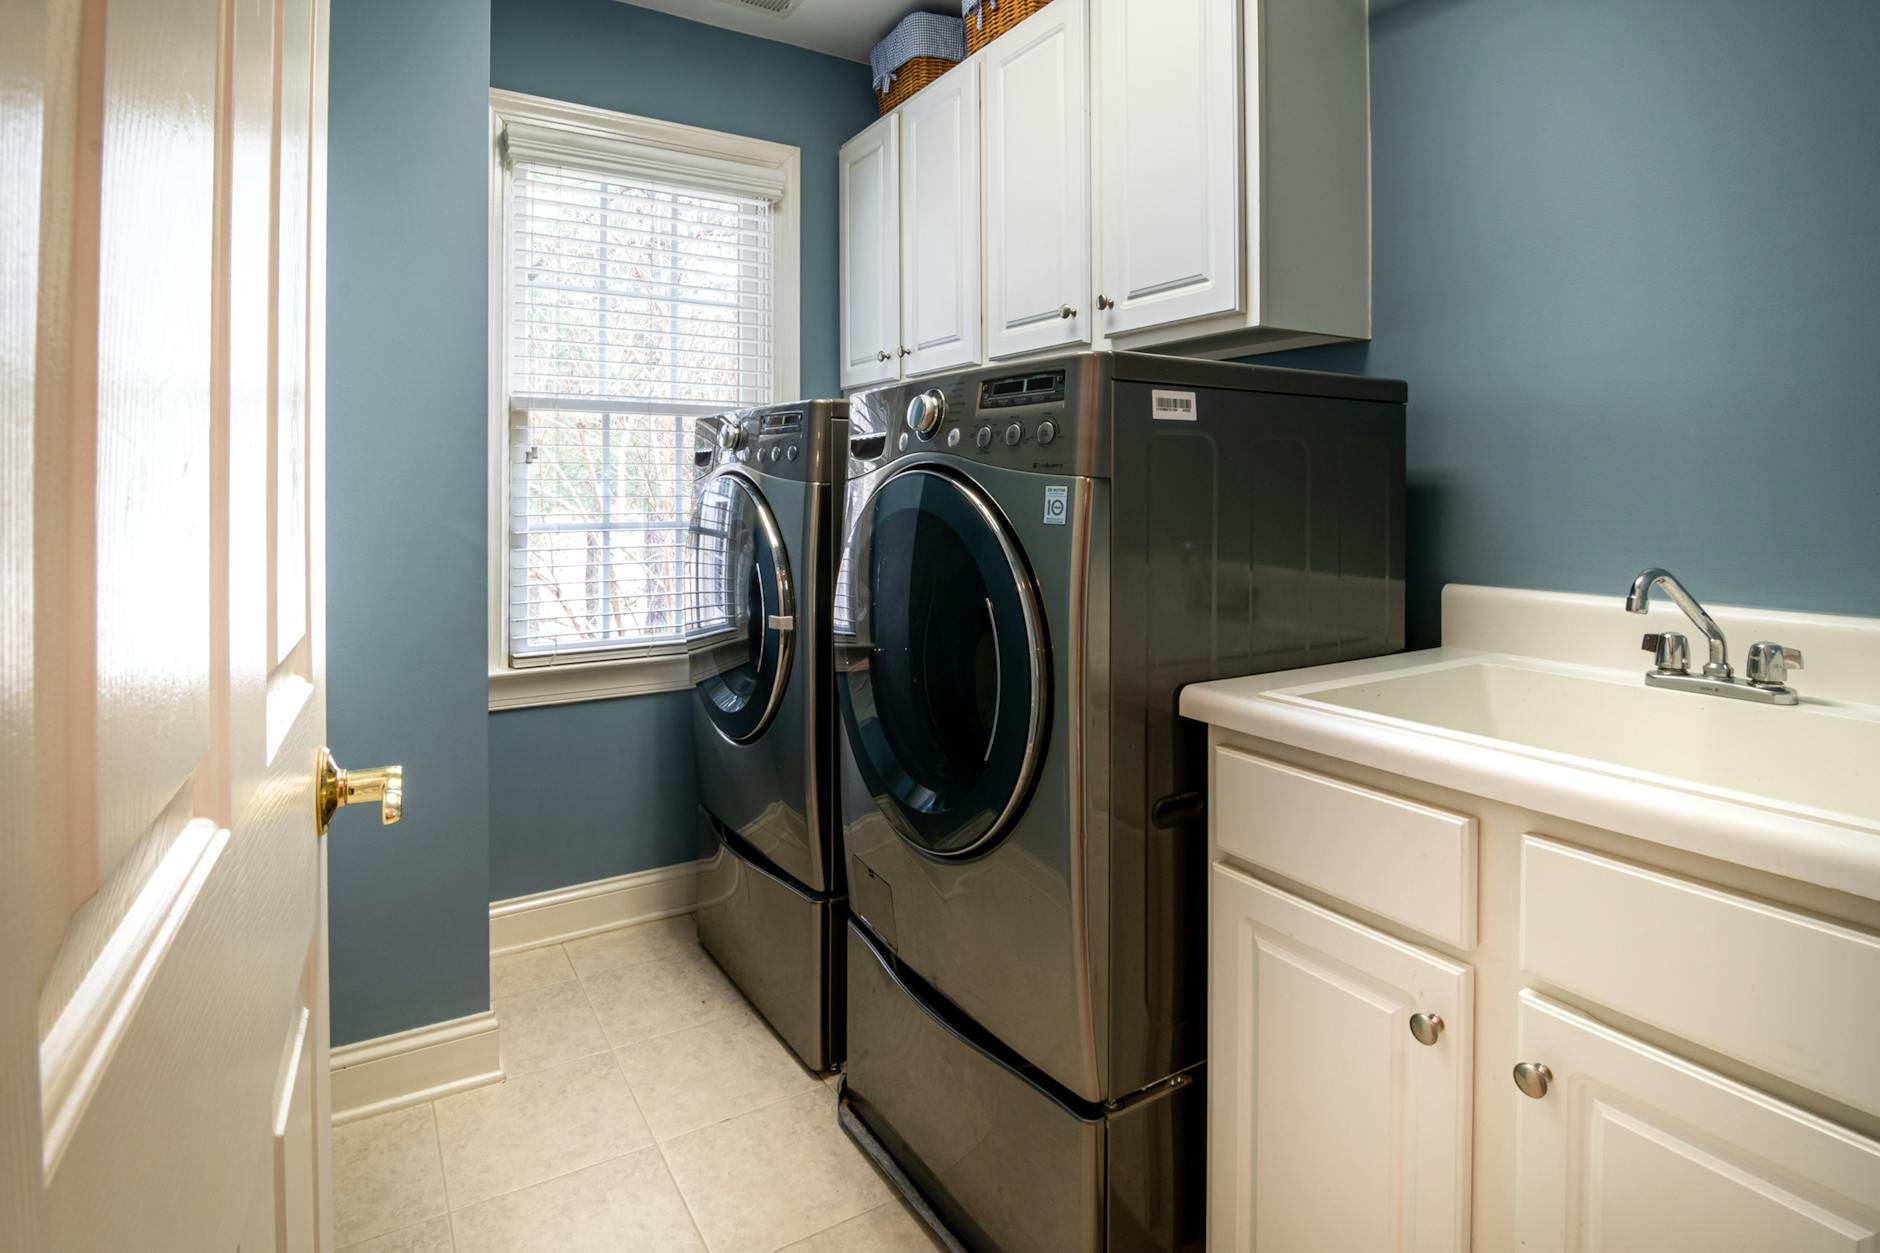
A laundry with a window is something buyers notice, even if they don't immediately say why. Natural light in a utility space signals ventilation, freshness, and a certain quality of build. The problem is that a window in a small, often cluttered room is also one of the hardest things to expose correctly in a property shoot. Get it wrong and you either blow out the window completely or drag the interior down into murk. Get it right and the room punches well above its square footage.
Why laundry windows are technically difficult
Laundries tend to be compact. That means the camera sits close to surfaces and the window dominates a large portion of the frame. The dynamic range between a bright exterior and a shadow-heavy interior can easily exceed 5 or 6 stops, which is more than most cameras handle cleanly in a single exposure.
Add to that the typical laundry contents: white appliances, reflective benchtops, glossy tiles. Each surface bounces light differently. A cheap flash aimed straight at the scene blows the appliances out. Ambient-only shooting leaves the window as a white rectangle with nothing behind it. Neither result tells the story the room deserves.
The solution Kitti Rivers Real Estate Photography uses on these shoots combines controlled flash fill with exposure bracketing, then blends the results in post. If you're deciding between those two approaches in isolation, the article on bracketing vs. single exposure for real estate photography lays out when each method earns its keep.
The right angle for a windowed laundry
Don't shoot directly at the window. That seems obvious, but many photographers set up facing it because the light feels inviting. It isn't. You're shooting into your brightest source and everything in front of it turns to silhouette.
Instead, position the camera at 45 to 60 degrees to the window wall. This lets the window sit in the upper corner of the frame as a light source rather than a subject. The room opens up, the cabinetry reads clearly, and the view outside (even if it's just a fence or a garden bed) adds depth without dominating the shot.
Keep the camera at bench height, not standing height. Around 90 to 100 centimetres is right for most laundries. Shooting from waist height flattens the benchtop and makes the room feel lower than it is. Bench height lets the eye travel across the counter and into the space beyond.
A wide-angle lens helps, but stay above 16mm full-frame equivalent. Below that, the walls start to bow and the appliances distort. 18 to 21mm gives you generous coverage without turning the room into a fish-eye caricature.
Managing the window exposure
Three methods work in practice. Which one you choose depends on your post-processing workflow and how much time you have on site.
- Exposure blending: shoot a correctly exposed interior frame and a correctly exposed window frame, then blend them in Lightroom or Photoshop. The window frame is exposed for the exterior; the interior frame is lit with flash fill. This gives the cleanest result and the most control over how much exterior detail you retain.
- HDR bracketing: shoot 3 to 5 frames at 1-stop intervals and merge them. Works well when the room has no movement and you have time to tone-map carefully. Less control than manual blending, but faster on a tight schedule.
- Single-shot with fill flash: one correctly exposed ambient frame with a bounced off-camera flash to lift the shadows. Fastest on site, but demands careful flash positioning so you don't create a flat, overlit look. Not ideal if the exterior view is worth showing.
Staging the space before you shoot
Kitti Rivers Real Estate Photography always runs a staging check before setting up the tripod in a laundry. The things that kill these shots are almost always visible before the camera comes out.
Clear the benchtop entirely. Laundry detergent, stain remover, forgotten socks: all of it goes in a drawer or a bag off-site. Leave one or two clean folded towels if the bench needs some warmth, nothing more. The window ledge needs the same treatment. A dead plant or a dusty ornament on a window ledge becomes the first thing the eye goes to in the finished image.
Wipe down appliance fronts. White washing machines and dryers are remarkably good at picking up fingerprints and lint in photography. A clean microfibre cloth across the front door and control panel takes 30 seconds and matters in the final image.
If the laundry has overhead strip lighting, switch it off during the shoot. Mixing warm incandescent or cool fluorescent overhead light with natural window light creates a colour cast that's difficult to fix in post without the whites going either yellow or blue. Natural light plus controlled flash gives you one consistent colour temperature to work with.
For more on the broader staging approach before photography day, the guide on how to style a laundry room that impresses buyers covers the room-by-room decisions in detail.
Showing the view through the window
If the window looks onto something pleasant, even a modest garden or a bright sky, that exterior detail is worth preserving in the blend. It tells buyers the room has light and ventilation, not just a frosted glass pane over a brick wall.
To retain the view, expose the window frame at the ambient exterior setting, typically 2 to 3 stops darker than your interior exposure. When you blend the two frames, bring the exterior layer in at reduced opacity so the outside reads clearly but doesn't compete with the room itself. The exterior should feel like context, not the main event.
If the window looks onto a blank fence or a neighbour's wall one metre away, retain it at low opacity or let the glass go slightly bright. A hint of light is more appealing than a clear view of weathered timber. You're not hiding anything buyers won't discover at the open home; you're choosing what the image emphasises.
Post-processing the final image
Colour temperature is the first thing to set after blending. Pull the whites and highlights back on the window area until the frame reads as a natural light source, not a blown aperture. Then lift the shadows on the far wall and under the bench to match the brightness of the window-adjacent surfaces. The goal is a room that reads as evenly lit by natural light, even though you've used flash to achieve it.
Lens correction is non-negotiable. Even at 18mm, vertical lines on cabinetry and appliances will show slight distortion. Use the automatic lens profile correction in Lightroom and then check the verticals manually. A slightly converging cabinet edge reads as an amateur shot, and buyers notice even when they can't name it.
Finish with a light sharpening pass on the cabinetry and benchtop surfaces. Laundries sell on practicality, and crisp joinery, clean handles, and readable benchtop texture all reinforce the sense of a well-maintained, quality space.
When the laundry is worth a dedicated shot
Not every laundry needs to be in the listing. If it's a converted cupboard with a stacked washer-dryer and no natural light, a single wide shot from the hallway showing the space exists is enough.
But a laundry with a window, decent bench space, and proper cabinetry is a room buyers compare across listings. It belongs in the gallery with the same level of care as the kitchen or bathroom. Photographing a bathroom with a skylight involves many of the same exposure challenges, and the window-blending technique transfers directly.
Kitti Rivers Real Estate Photography treats utility spaces as selling opportunities rather than afterthoughts. A well-photographed laundry with a window takes an extra 15 minutes on site and can shift how a buyer reads the entire property.