
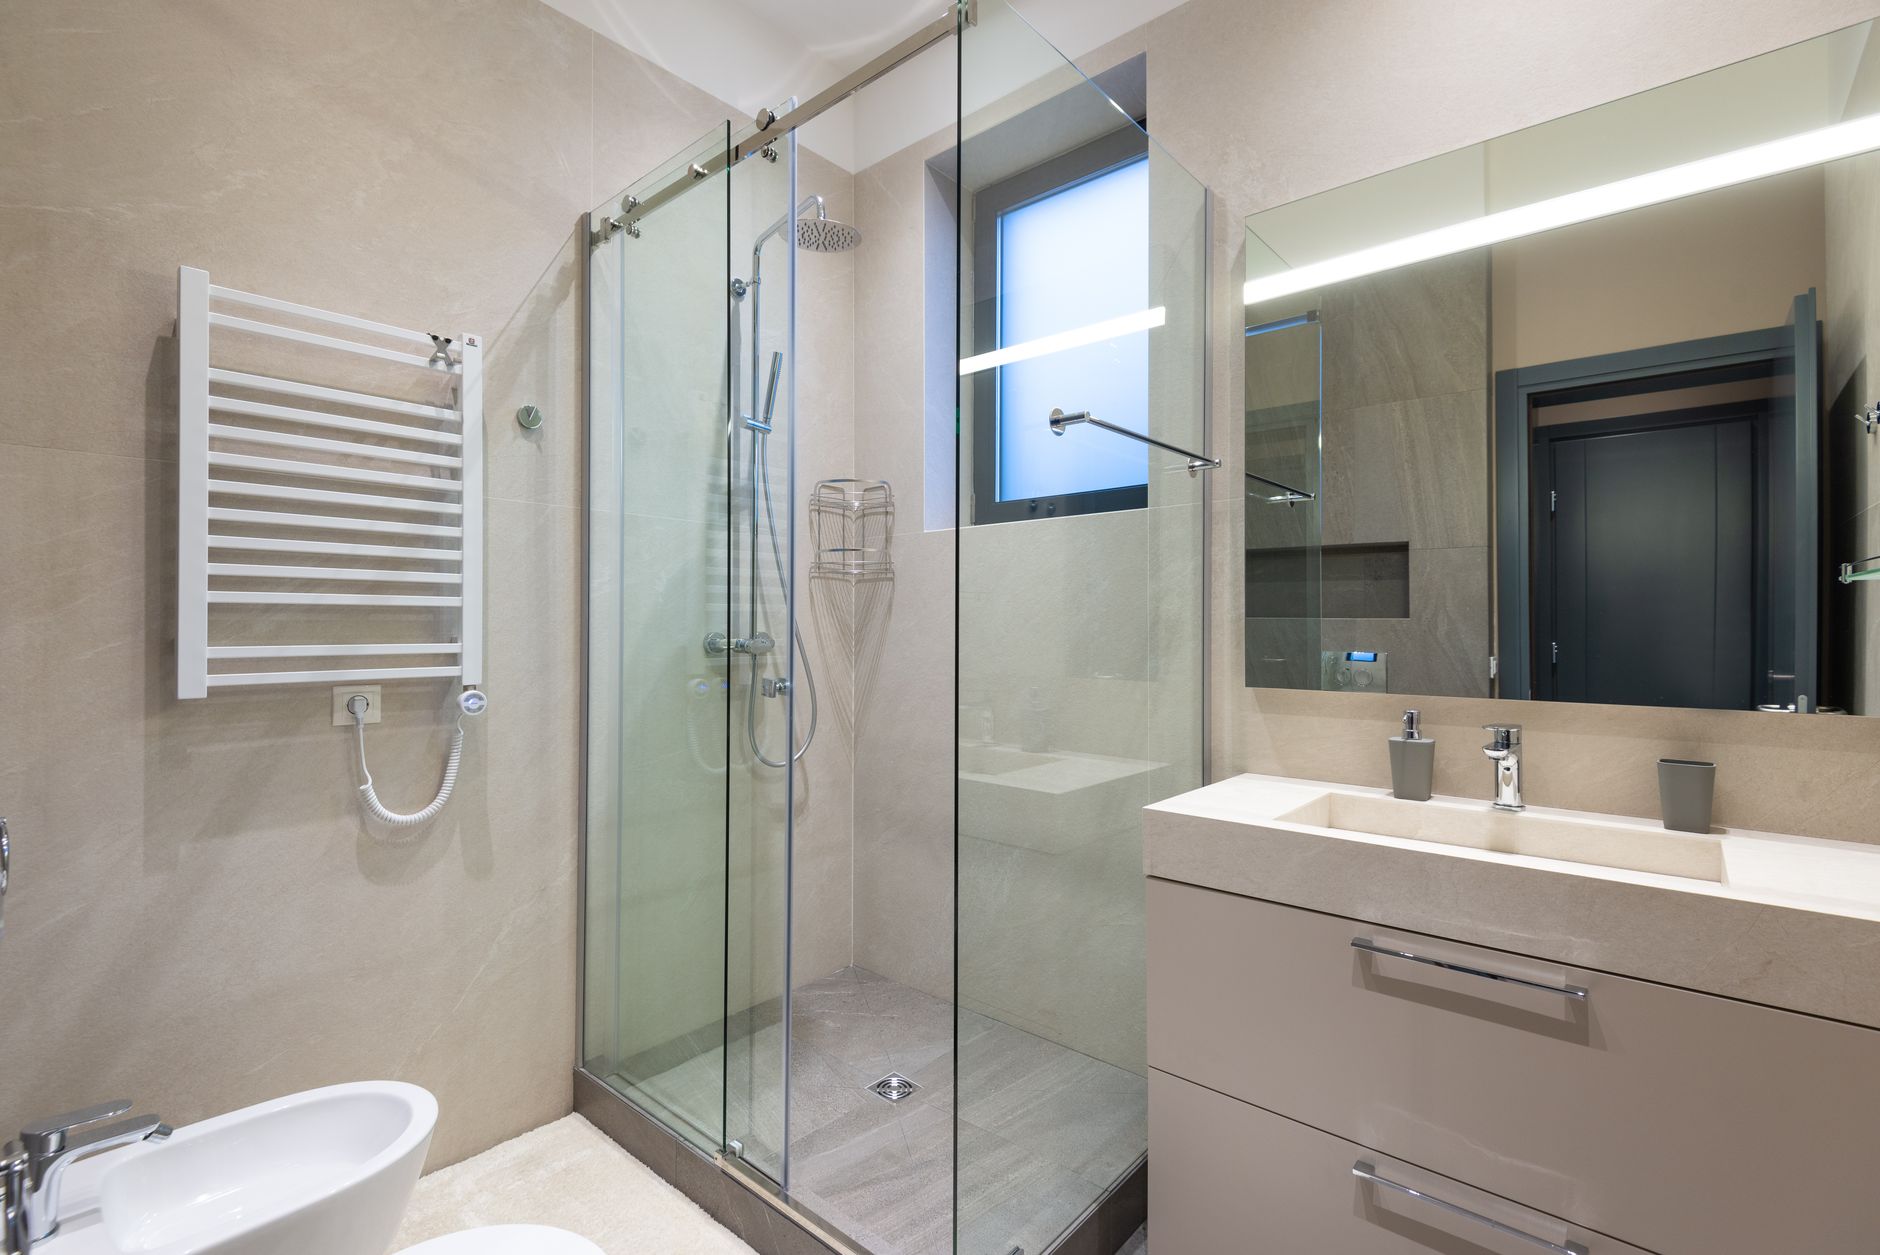
A glass or frameless shower is a genuine selling point in any bathroom, yet it's one of those features that listing photos consistently fail to do justice. The glass picks up every smear, water mark, and reflection. The camera sensor sees a blown window where you planned a bright, airy backdrop. And the very thing that makes the shower beautiful in person, its transparency, is what makes it so stubborn to photograph. Getting it right takes preparation, positioning, and a deliberate approach to light.
Why glass showers are so difficult to shoot
The challenge is threefold. First, glass carries marks that are invisible to the naked eye but show up ruthlessly under a camera's dynamic range. Second, the photographer's own reflection can appear in the panel if the angle isn't chosen carefully. Third, frameless showers often sit adjacent to a window, which means you're dealing with a high-contrast scene: deep shadow inside the shower enclosure, and a bright white sky just beyond the glass.
None of these problems are insurmountable. They just each need a specific fix before you press the shutter.
Start with a thorough clean, then clean again
This isn't negotiable. Ask the owner to squeegee and polish every glass panel at least an hour before the shoot, then again immediately before you photograph it. Microfibre cloths and a streak-free glass cleaner (not a foamy bathroom spray) are the tools. Water spots from the last shower are invisible in a bathroom with overhead lighting but appear as a constellation of rings the moment light rakes across the glass at an angle.
Check from multiple angles after cleaning. Stand where the camera will go and tilt your head. Any remaining haze will catch the light. Wipe again. It sounds obsessive, but a single unaddressed streak can cost twenty minutes in post-processing that a thirty-second wipe would have solved on location.
The inside of the shower matters too. Clean the floor, the drain, the fixtures, and the internal face of the glass. Buyers notice soap scum on a shower screen the same way they notice a cracked tile.
Choose your angle to eliminate your own reflection
The most common mistake photographers make with frameless showers is shooting square-on, which places the camera directly in the glass's reflection zone. Shift to a 30–45 degree angle to the shower face instead. This pushes your reflection off to the side, out of the frame. It also tends to reveal the interior of the enclosure, the fixtures, the tile work, and the depth of the space, which reads far better than a flat head-on panel of glass.
A lower camera position, around 1 to 1.1 metres from the floor, often works well in bathrooms. It reduces the chance of catching overhead lights as glare points in the glass and gives the room a slightly more spacious, grounded feel. For bathroom photography specifically, review the principles in the guide on how to photograph a bathroom with a skylight, which covers similar exposure and angle decisions when bright light sources sit close to reflective surfaces.
Managing the window behind the shower
A window inside or directly behind a shower enclosure creates the same blown-out problem you'll find in any window-adjacent room. The glass compounds it: you're now looking through two layers of transparency, each with its own reflective surface, into a bright exterior. There are three ways to handle this.
- Flash fill: A speedlight or off-camera flash bounced off the ceiling or a nearby wall brings the interior exposure up to meet the window. This is the fastest fix on location.
- Exposure bracketing: Shoot multiple exposures and blend in post. The interior shot exposes for the tile and fixtures; the highlight-recovery shot preserves the window detail. Most editing workflows handle this in under five minutes.
- Positioning the shoot for overcast light: On a bright day, wait for a cloud to pass over. On a structurally overcast day, the window behind a shower enclosure becomes an asset, providing soft, even, diffuse fill.
The guide on photographing properties with large windows and blown-out sky goes into detailed technique on exposure blending that applies directly here.
Lighting the interior of the enclosure
Inside a frameless shower, the tile work is the story. Buyers want to see the grout lines, the material, the texture. Without directional light, the inside of the enclosure goes flat and grey. A small speedlight placed low and to the side of the shower, angled upward slightly, throws definition across tiled surfaces without creating a hot spot on the glass face.
Keep the flash power low. You're not trying to make the interior look artificially bright. You want just enough light to separate the tiles from the surrounding shadow and give the space a sense of depth. Too much flash from straight ahead will bounce straight back at the lens through the glass.
If you're working with ambient light only, the best approach is to photograph when a window to the side of the bathroom (not behind the shower) provides gentle, raking light. That natural side light does the same job as a low-power flash: it reveals texture without creating glare.
Frameless vs. framed: does it change the approach?
Frameless showers are harder to photograph because there's nothing to visually anchor the glass in the frame. A framed enclosure has a clear edge that reads immediately as a defined object. Frameless glass can, in the wrong shot, look like a dirty mark or a post-processing artefact rather than a premium feature.
The fix is contrast. Shoot with a darker tile or wall behind the shower so the glass edge registers. If the bathroom is white-on-white, a towel in a deep, saturated colour placed just outside the frame can introduce enough tonal contrast to make the glass edge legible without appearing in the final shot. Dark grout also helps, since it gives the glass something to read against.
Post-processing the glass
Even a well-shot glass shower benefits from a targeted pass in editing. In Lightroom or Capture One, use a radial or linear gradient to drop the highlights in any faint reflection you couldn't eliminate on location. Clarity applied selectively to the tile work behind the glass, not to the glass face itself, sharpens the interior without making the panel look etched or over-processed.
Removing a faint photographer reflection that survived the shoot is a fifteen-minute job in Photoshop using content-aware fill. It's not ideal, but it's far preferable to losing the shot entirely. The goal in camera is to eliminate reflections at source. Post is the safety net, not the strategy.
Putting it together for the listing
A well-photographed frameless shower signals quality to a buyer before they've read a single word of the listing copy. It says the finishes are premium, the bathroom has been maintained, and the seller has paid attention. A murky, reflection-laden shot of the same shower says the opposite.
The technical demands are real: prep the glass meticulously, control your angle to kill your own reflection, manage the window exposure with flash or bracketing, and light the interior to reveal texture. Do those four things and the shot will hold its own alongside any other feature in the listing.
For a broader look at how preparation shapes the outcome of a bathroom shoot, the guide on how to style a bathroom that photographs well and sells covers the staging decisions that set up the technical work on shoot day.