
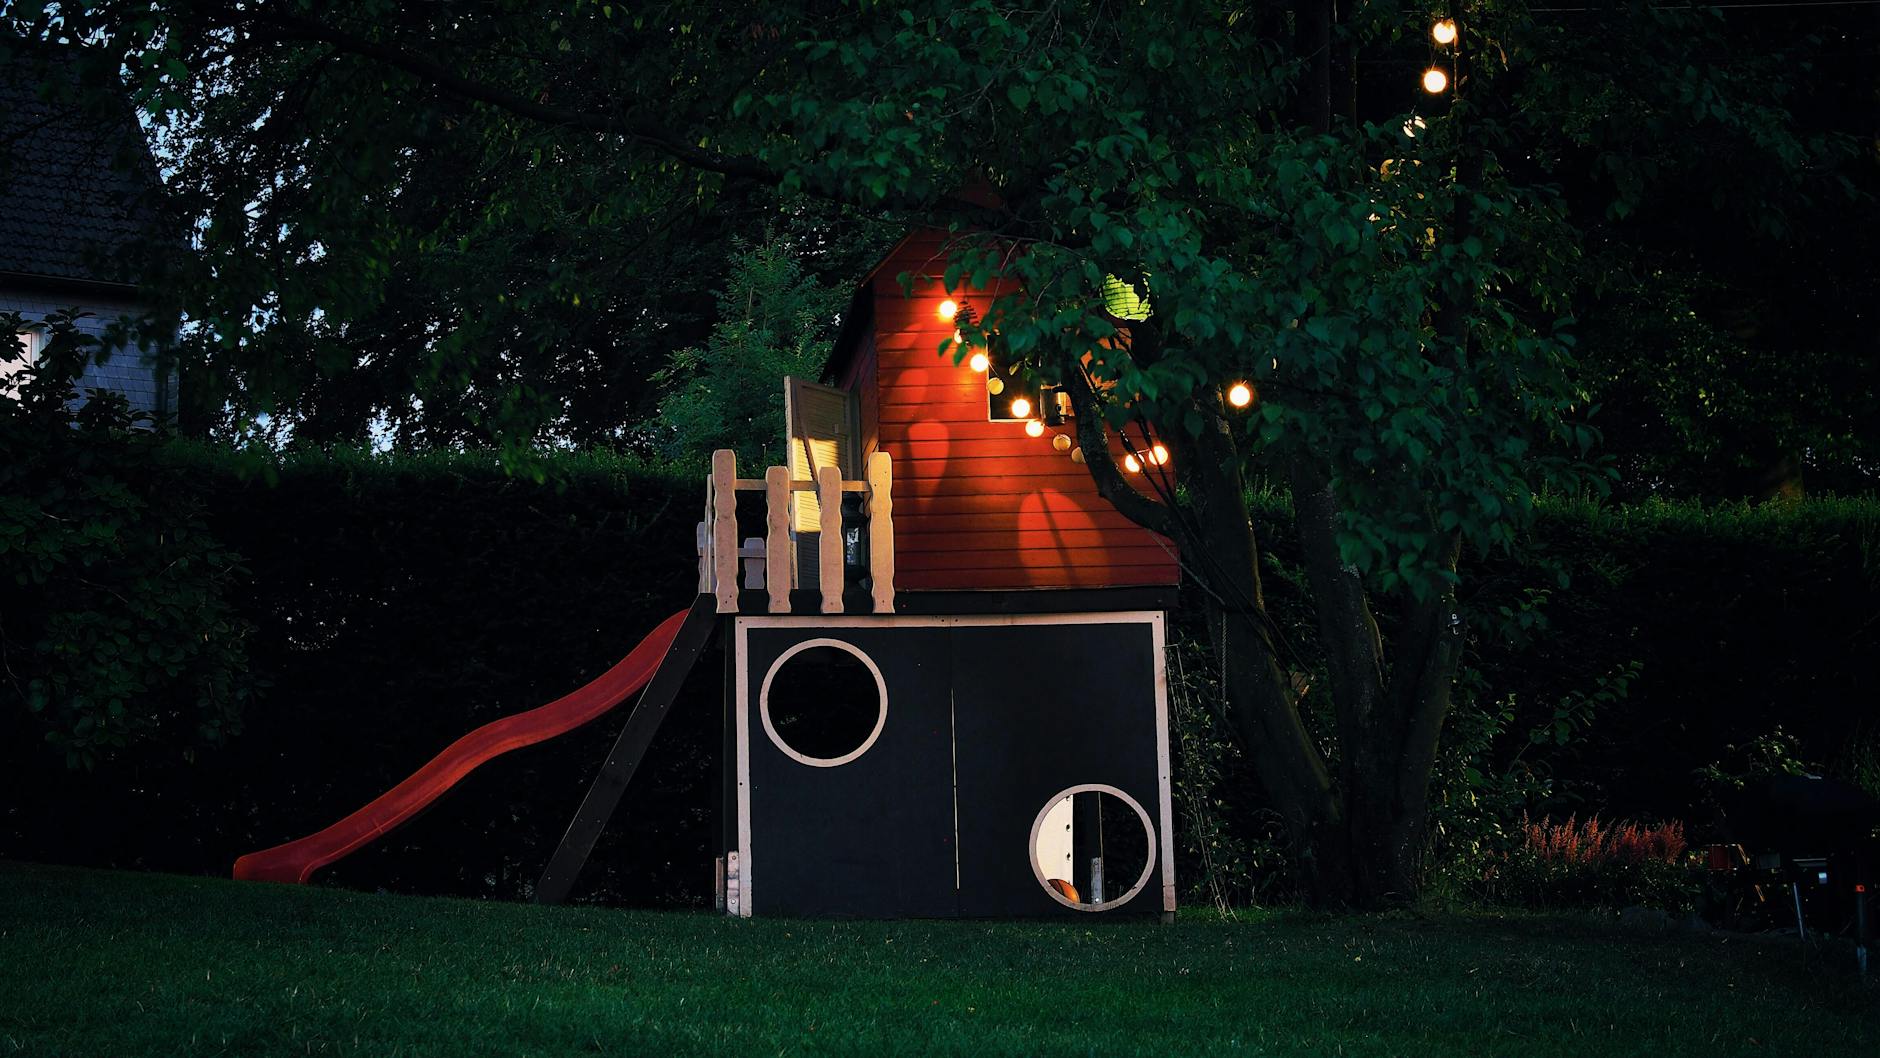
A children's play area or cubby house can be one of the most emotionally compelling features in a family home listing. Buyers with young kids see it and immediately picture their children using it. But most property photographers treat it as background, grabbing a wide shot from the deck and moving on. The result is a cluttered, unreadable image that does nothing for the listing. A few deliberate decisions at shoot time change that completely.
Why it's worth spending time on this shot
Family buyers in Australia are actively searching for homes with outdoor play space. A well-photographed play area signals room, safety, and lifestyle in a single image. It also differentiates the listing from comparable homes on the same street that only show a lawn and a fence.
The cubby house specifically tends to photograph badly for one simple reason: it's designed for a child's scale, not a photographer's. Get close, get low, and treat it like any other architectural feature worth framing properly. A cubby house photographed at adult standing height looks like a dog kennel. Drop to 90–100 cm and it reads as a real structure with character.
Timing and light
Play areas are almost always outdoors, which means the same rules that apply to alfresco dining areas apply here. Shoot early morning or in the two hours before sunset. Midday light in Australian summer is brutal on timber cubby houses: it bleaches the wood, creates hard shadows inside any openings, and flattens the whole structure into a pale rectangle.
A cloudy day is your friend. Overcast conditions wrap the light evenly around curved slide rails and play equipment, eliminating the harsh patches of sun and shade that make these spaces unreadable in direct light. If you're shooting on a clear day, position yourself so the sun is at roughly 45 degrees to the structure, not behind it and not in your face.
Avoid shooting into a backlit cubby. The interior will go completely dark while the exterior blows out, and no amount of HDR blending will make that look natural.
Clearing and styling the space before you shoot
This is where most shoots fall apart. Play areas accumulate: bikes leaning against the fence, deflated balls, tangled hoses, broken plastic toys faded by UV. None of that reads as aspirational. Before the photographer arrives, the space needs a proper edit.
- Remove any broken or obviously sun-damaged toys entirely.
- Store bikes and scooters out of shot or move them to a garage.
- Leave two or three items that photograph well: a clean soccer ball, a timber swing, a small watering can near a garden bed.
- Sweep sand back into the sandpit and level the surface.
- Mow the grass around the play structure immediately before the shoot, not two days before.
For the cubby house itself, open any shutters or Dutch doors fully. A closed cubby reads as a storage shed. An open one reads as a functioning little room, and that's what sells it.
Choosing your angle and lens
Wide-angle lenses, the standard tool in real estate photography, can distort play structures badly at close range. A 24mm full-frame equivalent will make a cubby house look like a carnival ride if you're within 2 metres of it. Step back to 4–5 metres and shoot at 35mm or even 50mm. The structure will look proportional and the surrounding yard will still be readable.
Shoot two compositions: one wide that shows the play area in context with the yard and fence line, and one tighter that frames just the cubby house or the main play structure. The wide shot goes in the listing to establish space. The tighter shot can appear in a social media crop or a buyer's brochure where detail matters more than context.
For a multi-level play structure with a slide, a slightly elevated angle (standing on a step stool or shooting at 150–160 cm) can reveal the platform level and the slide in the same frame, which is far more informative than a straight-on ground-level shot that only shows the ladder.
Handling colour and contrast in post
Timber cubby houses and brightly coloured plastic play equipment present opposite colour problems. Timber goes muddy and grey in shade; saturated plastic slides and climbing holds can look garish in direct sun.
For timber structures, lift shadows slightly and add a small amount of warmth in your white balance to recover the natural honey tone of the wood. Don't push it far; a cubby house that looks like a new piece of furniture reads as fake. For plastic equipment, drop the vibrance 10–15 points before touching saturation. This tames the primary colours without making them look desaturated.
The surrounding lawn deserves attention too. A yellowed or patchy lawn undermines the whole image. A small boost to green saturation, targeted with a hue mask in Lightroom or Capture One, can recover a lawn that photographs worse than it looks in person. Keep it honest: the goal is accuracy, not invention.
Including context shots that show proximity
One of the most useful shots for a listing with a play area is the view from the kitchen or living room window looking out toward the structure. Buyers with young children care deeply about sight lines: can I see my kids from the kitchen while I'm cooking? A photo that shows the play area framed through a window or open door answers that question before it's asked.
This shot also helps buyers understand the scale and placement of the play area relative to the house, which a standalone yard photo can't convey. It's a shot worth adding even if the window has reflections to manage. The same techniques used when photographing large windows with a blown-out sky apply here: expose for the interior, bracket for the exterior view, and blend in post.
When the play area is a liability
Not every buyer wants a play structure in the backyard. Empty-nesters, investors, and couples without children often see a large cubby house as something they'll have to dismantle and dispose of. If the play structure is substantial (a full timber fort with platforms and a slide) and the agent is targeting a broad buyer pool, it's worth discussing whether to photograph it prominently or show it as one element of a larger yard.
The answer is almost always to photograph it honestly, but frame the wide yard shot so it shows how much usable lawn remains. A play structure at the back corner of a large yard, with open grass in the foreground, reads as an optional feature. A play structure that fills the entire frame reads as something that defines the property, which may not be the message you want to send.
Keep the shot in the listing. Removing it creates a trust problem when buyers visit the home and find a large structure that wasn't in the photos.
A quick checklist before pressing the shutter
Check the frame for garden hoses, extension cords, pet water bowls, and any items that aren't part of the play space itself. Look for the neighbour's fence line: if a rotting paling or overhanging tree is prominent, shift your angle until it's out of frame. Confirm the grass is mowed, the sandpit is levelled, and at least one shutter or door on the cubby is open. Then shoot.
A children's play area is one of the easier outdoor features to photograph well once you've thought it through. It rewards the same attention to light, angle and styling that any other room in the house deserves. Treat it like a room that happens to be outside, and the images will reflect that.